To see much more artwork plus illustrated stories, visit Chained Muscle

POW of POW’s Fiction – Gay S&M Stories sent the information and pictures below, about how he was inspired to build his very own pillory, and how he pulled it off! See below:
I never paid much attention to pillories. But then one made an appearance in A Left Turn at Albuquerque – Part 07, and it caught my eye. Trying to avoid giving away any spoilers, this (heavily edited) exchange takes place:
Jailer: “How are you holding up in that thing?”
Prisoner: “It’s not comfortable.”
Jailer: “It’s not supposed to be.”
Followed by:
Prisoner: “Can you let me out of this thing?”
Jailer: “Of course I can. But I’m not going to. Under our rules, badly behaved convicts have to be in the pillory for at least five hours.”
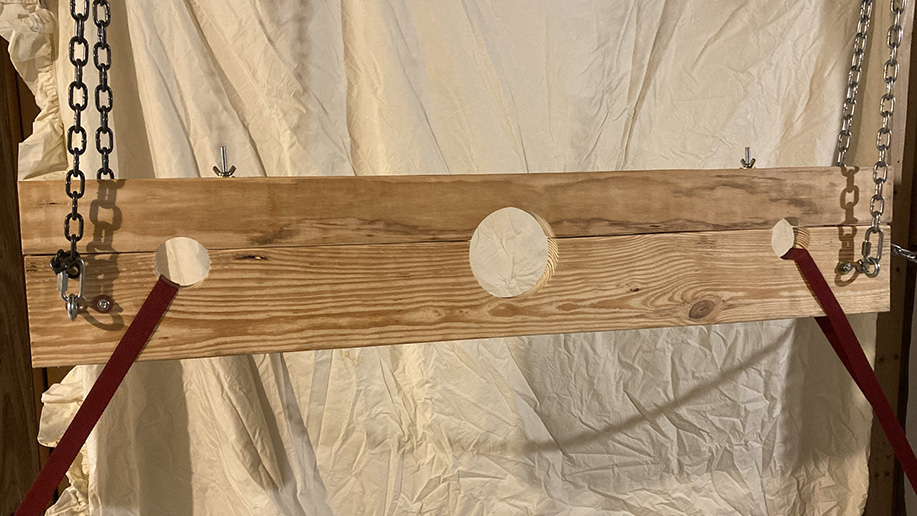
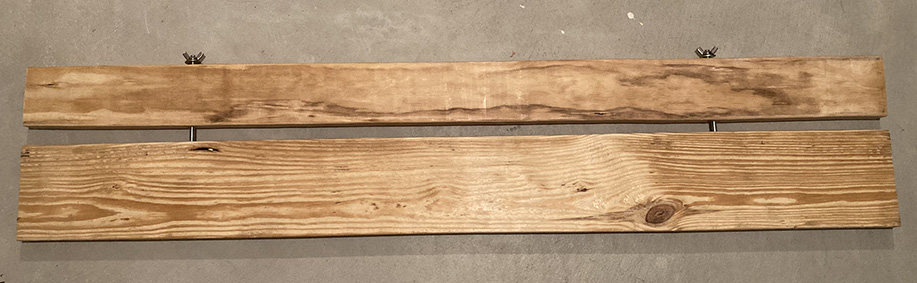
That fed right into something that is one of my core interest areas: long-term bondage with some sort of discomfort. Since I don’t know anyone who has a pillory, I decided to build one. Here’s the result:
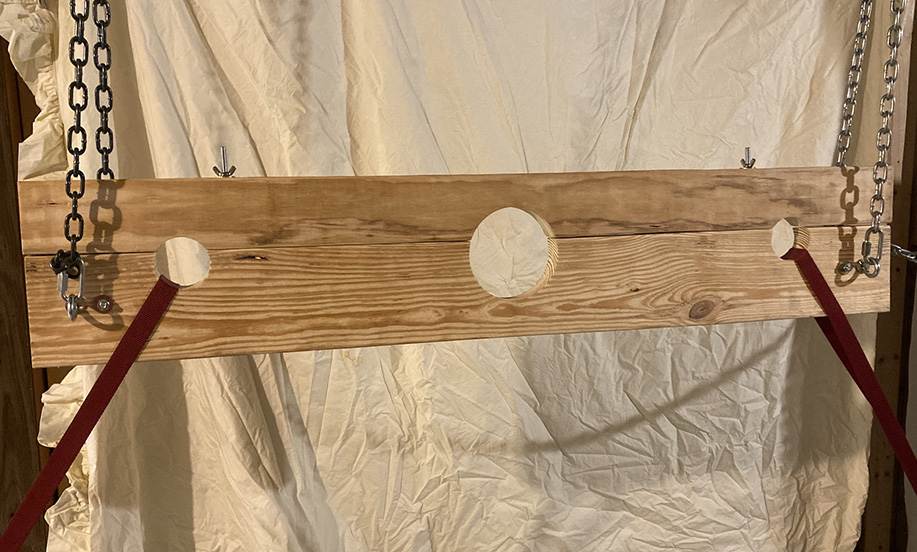
For the record, I am in no way a competent woodworker or craftsman, but nevertheless I’m pleased with how it turned out. If I could build this, I think almost anyone could. Very little skill required, just make sure you take adequate safety precautions.
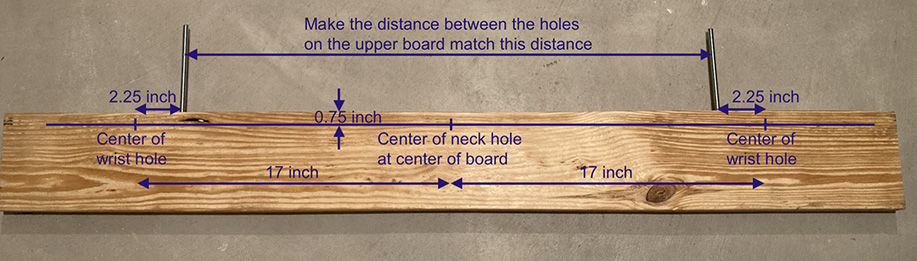
A typical pillory rests on a supporting stand. That was more complicated than I cared to attempt, but I had a good alternative: hang it from the steel beam running across my basement ceiling, and attach the sides to the support pillars that hold the beam up. The point is: The essential part of a pillory is the two separable wooden bars with half-holes in each for neck and wrists. Everything else is variable and you can adapt to suit whatever circumstances you have.
Note that whatever support you use, remember to fix only the bottom part of the pillory in place so the top part is free to move.
Measurements are given in inches and feet because that’s what’s available in my local hardware store. Convert to centimeters as needed at 1 inch = 2.5 cm.
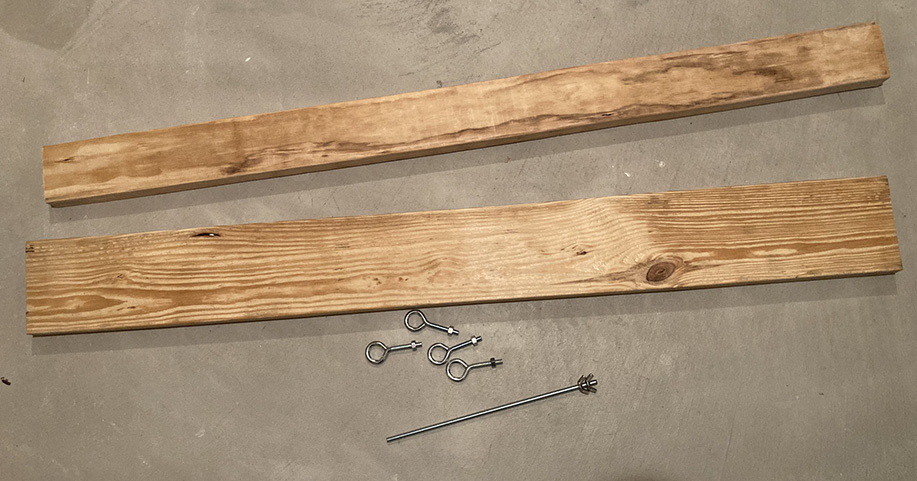
Mark all measurements before drilling anything.

I considered applying some sort of stain or sealant but decided I prefer the look and feel of raw wood. If you do want to apply something, this is the time to do it.
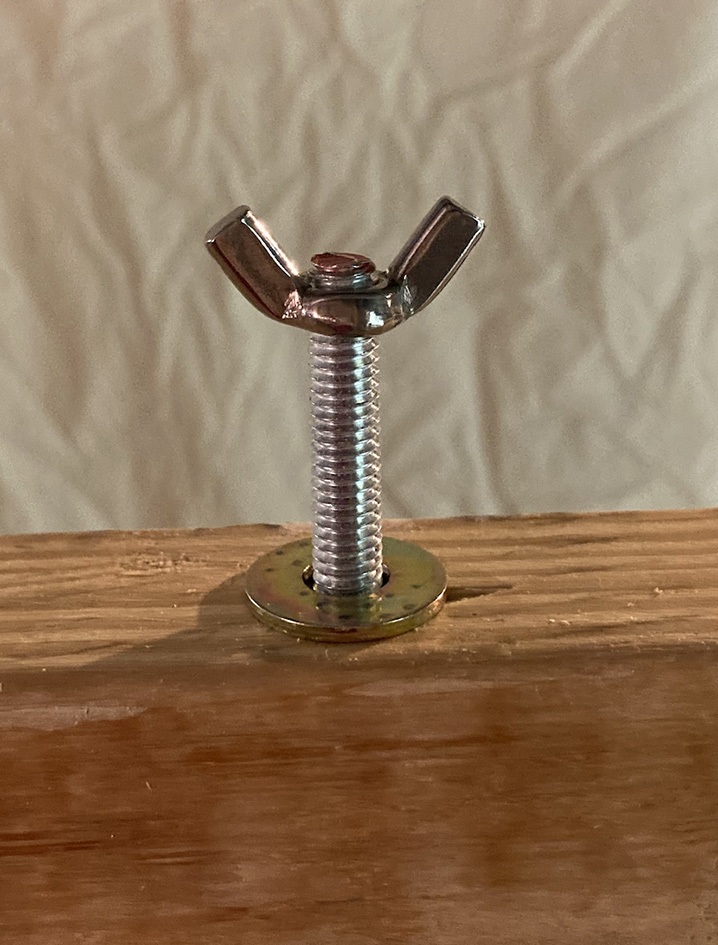
If you plan to use this with a partner, you’re done. The wing nuts on the threaded rods will be enough to lock the upper board against the lower one. The prisoner won’t be able to untwist them and set himself free, although the rods are tantalizingly close to his fingers and he will be tempted to try to reach them. He won’t be able to, though it will be fun to watch until he gives up.
If you want to use this for solo play, you’ll need a different way to hold the boards together. Make metal brackets to do the job.
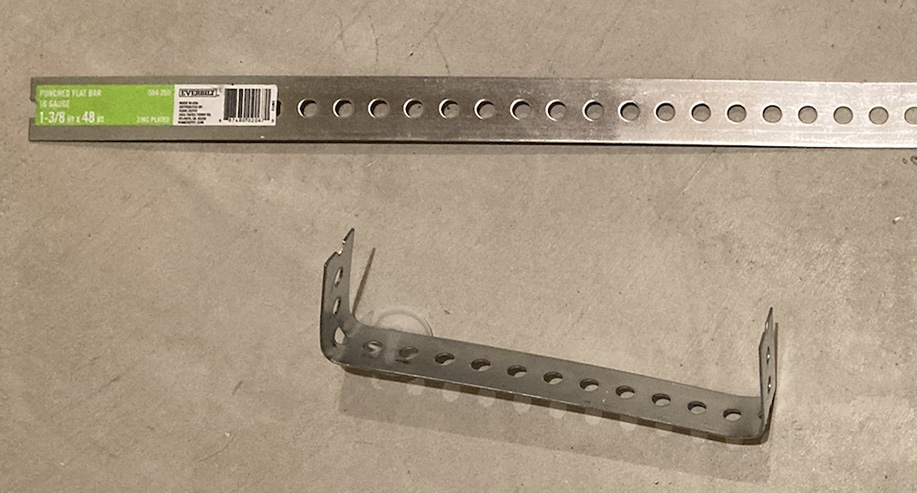
My metal strip came with pre-punched holes all along the center. If yours didn’t, you’ll need to drill a half-inch-diameter hole to fit over the threaded rod.
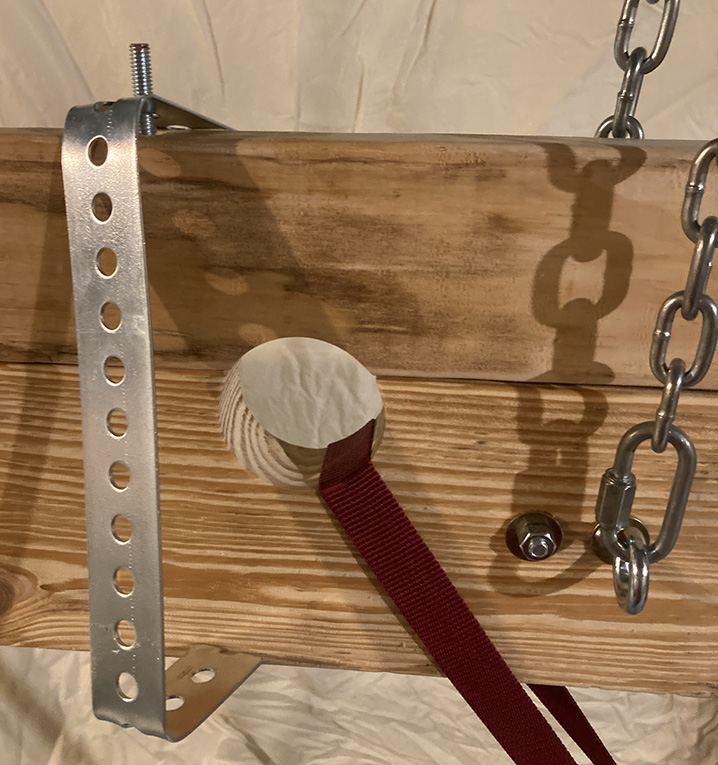
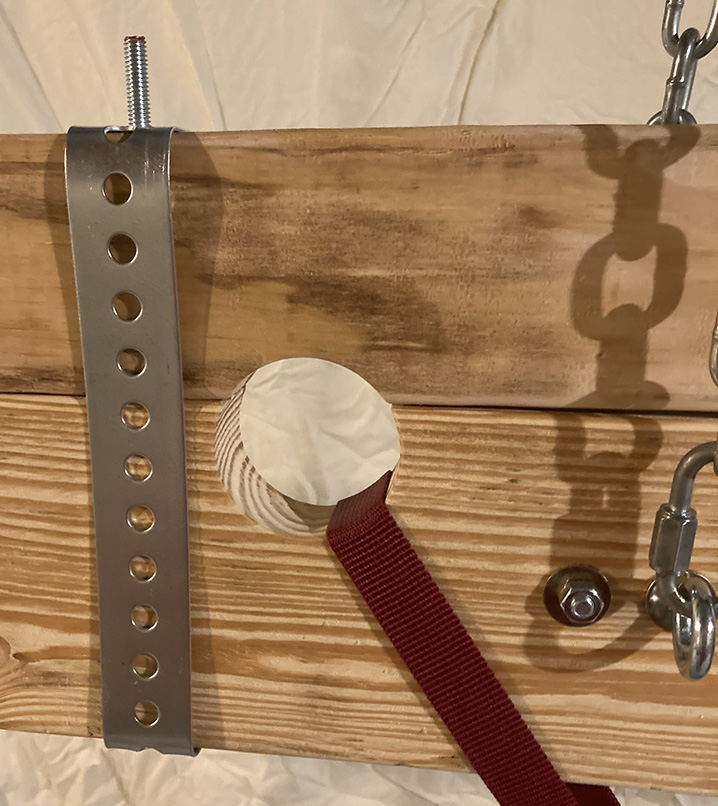
To use, put your neck into the neck hole but leave your wrists free. Fit each bracket over one of the threaded rods. Lift the top board slightly, just enough to get your wrists in place without dislodging the brackets, then lower the board back down. You should then be able to clamp the brackets into the locked position. Reason for this sequence: it’s difficult to fit the brackets onto the threaded rods with neck and wrists all placed in their holes; much easier to do it with free hands.
Making bends that are more than 90 degrees means that when they’re in place, the brackets apply up-and-down pressure to the two boards and hold them firmly together. That pressure also ensures that the brackets won’t slip loose until you deliberately remove them.
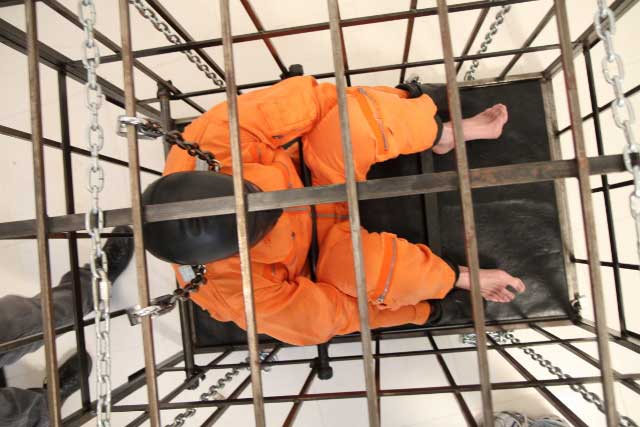
Your setup may vary, but mine works like this. I suspended chains from the overhead beam using S-hooks.
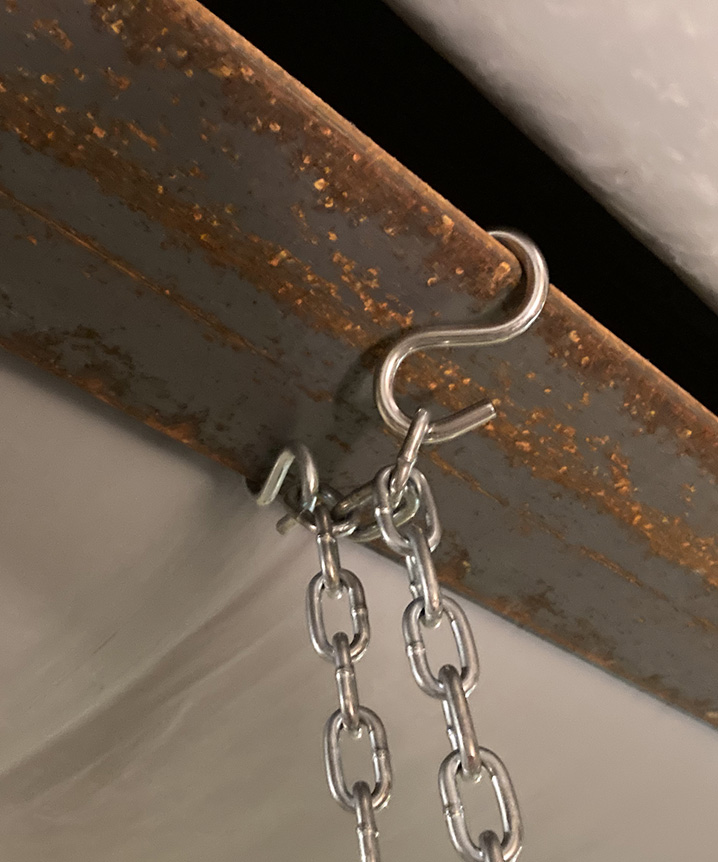
Those chains hold up the pillory using the mounting bolts. Then straps go through the wrist holes and down to the base of the posts that support the overhead beam.
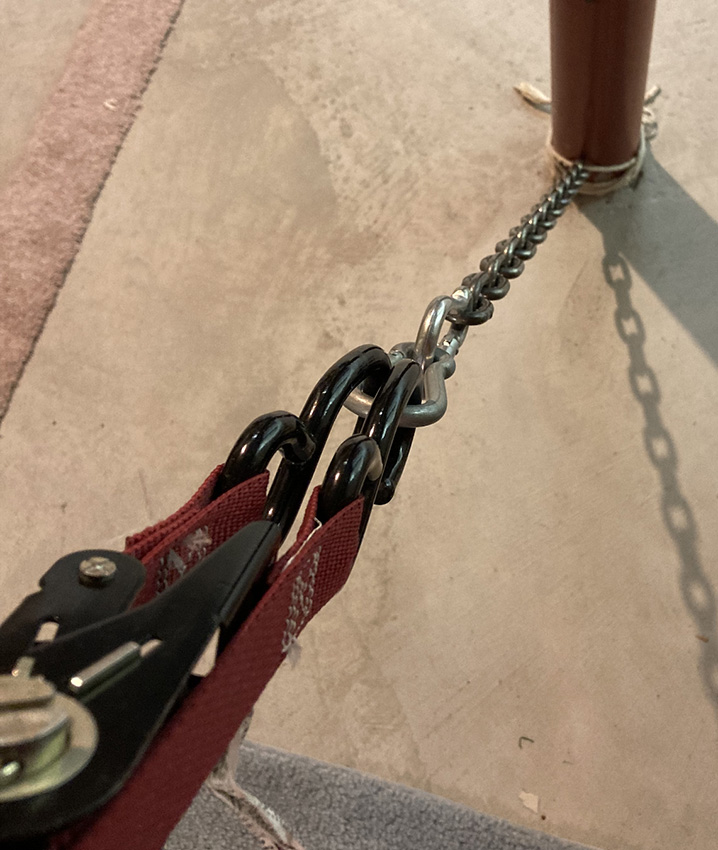
I cranked those straps down tight, and the pillory was fixed in position in up/down and left/right directions. Not shown: I tied the front mounting bolts to the wall studs in front, and the back bolts to a heavy table behind. That fixed the thing in all three dimensions so it could not move or tilt more than half an inch in any direction.
Again, if you’re a more talented woodworker than I am, you can create a support post and feet for your pillory. This version worked well enough for me. The pillory was fixed firmly enough that during my testing I couldn’t budge it; it held me exactly in position no matter how I struggled.
Important safety note, applicable to any self-bondage situation: plan and test and have multiple escape routes. Some people like to use timers or ice locks; I prefer to have an instant out available in case of emergency. House fire, sudden medical issue, whatever the reason, I want to be able to get free quickly when necessary. But within that constraint, I like the bondage to be real and secure. Using the metal brackets as locks meets those criteria. The locks are flush against the wood and easily reachable when needed but otherwise out of the way. Also, releasing either one is enough to get completely free — if my right hand were to go numb for some reason, I could open the left lock, get the left hand out, then reach under and release the right lock.
I ran a bunch of short test scenarios until I was confident everything was working as designed. I even did an hour-long trial run without using the locks just to see how my body would react. It went well. After that I was feeling like I could go considerably longer so I planned a test for real.
I decided on a three-hour sentence. Well short of the five hours described in the Alburquerque story, but long enough. The verdict? Success!
Standing was boring and uncomfortable, but it did not feel dangerous at any time. Comfort-wise, it made for a good mid-range experience. A sleepsack provides very comfortable bondage. When wrapped up snug in one of those you can drift away into a happy sub mindspace and stop noticing the passage of time. A Roman-style cross, at the other extreme, is incredibly uncomfortable. There is no getting into a Zenlike “I’m not here” mental space when hanging on one of those. The pillory, I learned, is in between. I found it to be uncomfortable enough that I could never zone out. I was always keenly aware of the slow passage of time and of my body’s discomfort. But the discomfort was never bad enough that I felt the need to cut the scene short and stop. I never felt in danger of lasting harm. Physically, I think I could have stayed there much longer. Mentally, though, I hit my limit for solo play and would have needed an enforcer to keep me there any longer once the three-hour alarm sounded.
Afterward, my arms were sore for the next thirty-ish minutes, and at first I was unable to lift them very high behind me. Soon enough that passed, and they were back to normal. My neck remained a little bit stiff for several hours, but there were no lasting after-effects from the experience.
I found this to be a worthwhile project, fun to build and fun to experiment with. I learned that a pillory provides exactly the sort of experience that pushes my buttons: long-term uncomfortable bondage. I really did not know how effective the pillory was at delivering that and find myself much more a fan of the device having now given it a chance. A big “thank you” to author Hunter Perez for providing the inspiration!
Metal would like to thank POW for this information and for these pictures! See more from POW by clicking here.
For those who remember The Story of Dax, which appeared in the Metalbond Prison Library a few years back, the author, TheBadOne, has revised and revamped this story and has turned it into an e-Book! That’s right, now you can get The Order: Darren’s Induction by August Blackleather on Kindle!

The description reads:
“Darren thinks he’s the hottest, most hardcore submissive in town, but when he falls under the influence of the most dominant man he’s ever met, his entire world changes. Shephard isn’t just a beautiful, hypnotizing, and highly demanding Master. He’s one of the leaders of a secret and extremely selective S&M society made up of 24 distinct, diverse, and extremely kinky men.
“Follow Darren as he begins his journey into THE ORDER, where there are no limits, no escape, and nobody who’s ever wanted out — not even the full-time dungeon gimp in position 24.”
You can read the Metalbond version by clicking here
Get the Kindle version of The Order here
You can also find the author on X/Twitter under @AugustBAuthor
By POW
The story so far…
Elias is a male dom looking for a reluctant sub. Owen is a reluctant sub because he’s a straight sub.
NOTE: This is part of a much longer story called “Dr. “NOOOO!!!” — and this chapter has been slightly altered to suit the Metalbond site. For the full story, click here, but be forewarned that the complete story, especially the end, features a female dom. If you’re interested in primarily male-on-male action, try the chapter below, as well as chapters 3 and 8 on POW’s site.
Crag isn’t quite a bar and isn’t quite a club. It’s more of a co-op based in what used to be a manufacturing plant for railcar parts in the old industrial area of town. The members pool their resources to have a shared space for play and equipment and they host public events like tonight’s once a month. I’m not a member, so I pay the high guest rate when I visit, which is not all that often. I tend to hang out at the bars farther north in Edgewater when I’m looking for leather companionship, but I’ve visited Crag a time or two before. Great atmosphere – huge high ceilings, big rooms to play in with echoey concrete walls in a lot of them. A good dungeon vibe. And unlike the Edgewater bars, the focus here was not on drinks or conversation, but on getting physical. The money the co-op brought in was not to make a profit for a business but instead got reinvested into either the space or the gear.
I was dressed in my best: black leather from hat to boots, tight in all the places I wanted to show off like waist, biceps, and thighs. Short-sleeved lambskin shirt under a zip-front vest (unzipped) with a jacket over top, also open at the front now that we were inside out of the chill. Hunter boots down below and a biker cap on my head and I was looking every inch the alpha top.
Check out these images from Mister X /Spartan:
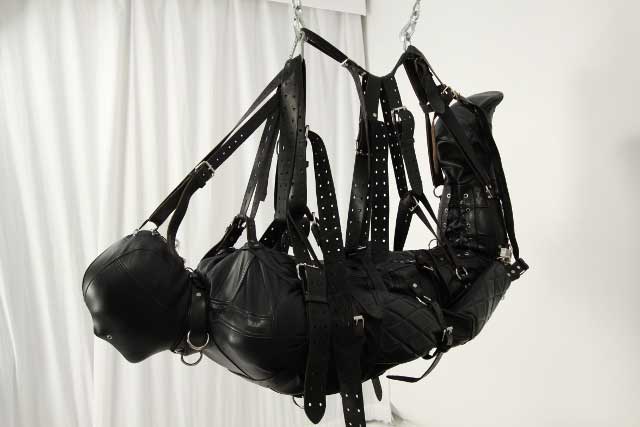
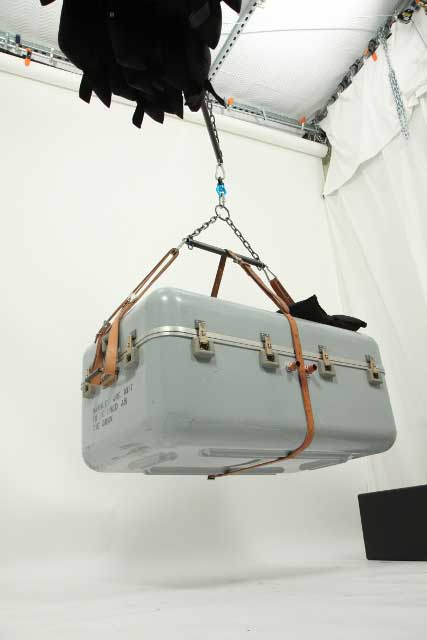
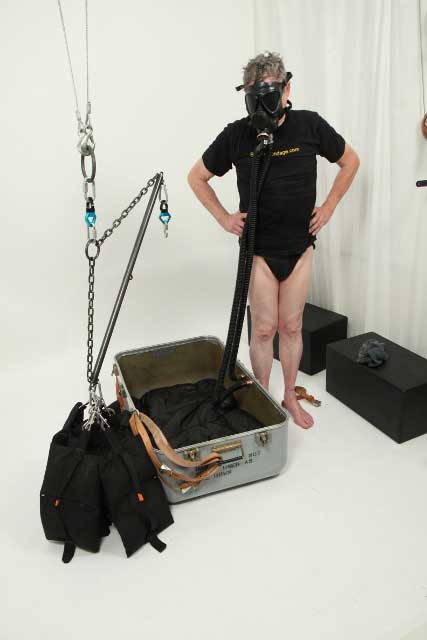
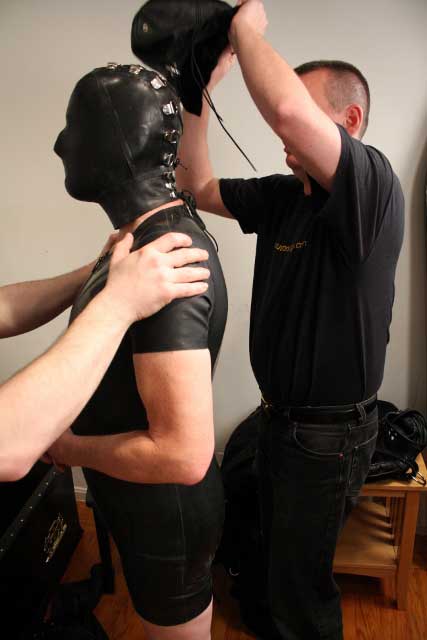
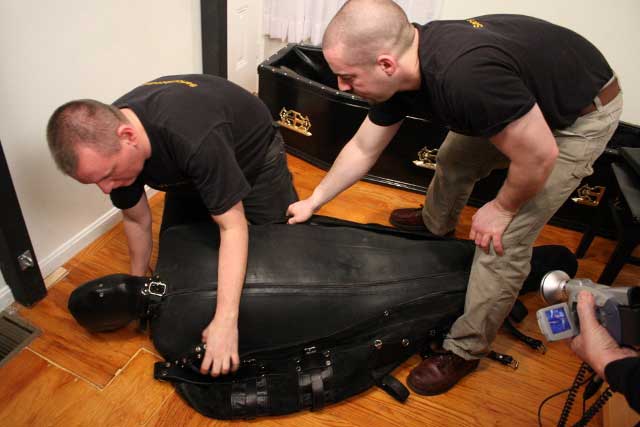
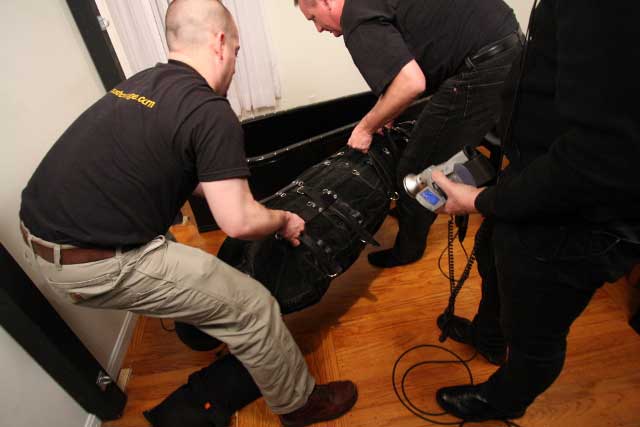
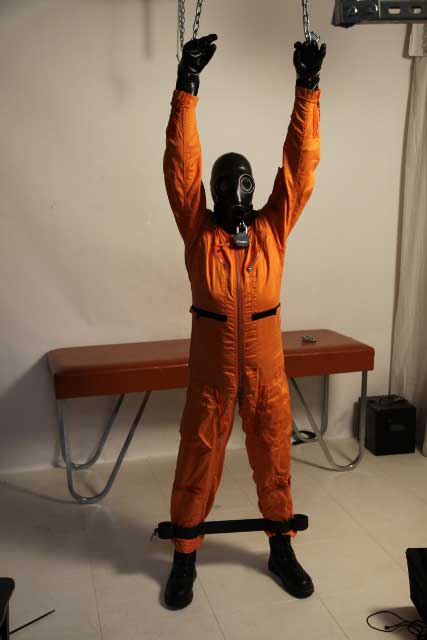
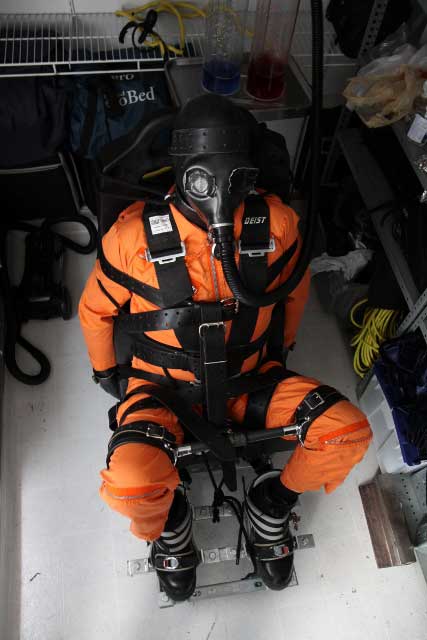
Mister X /Spartan is featured at Serious Male Bondage, where these images are from. The top scenario pictured above is from TIGHT SQUEEZE MISTER X.
Mister X /Spartan also has fiction in the Metalbond Prison Library.
He’s also got other writings over at Eckie’s site.
This is a clever story with a cool premise. It’s written by a kinky submissive hetero male, so there is a female dominant.

Click to read here
It’s from the Becoming Bear site
NOTE: I wish someone would write a similar story with all male characters!